Getting Started
Bookdown is an open-source R package that helps write books and articles. Before you can start developing your workshop websites, there are some installations and setups required.
Program Installations
Download and install R here, version 3.6.0 or higher. Follow the instructions for your operating system (Linux/macOS/Windows).
Check if you installed properly!
MacOS
Open the program Terminal (installed on Macs by default) and run the command “R”. An R Console should start and you should be able to start running R commands. If not, your install was unsuccessful.
Windows
- Click the “Start” menu icon in your bottom left of your taskbar (often a window pane).
- Cick “All >” (in the top right of the popup) to see all the programs you have installed.
- Scroll to the “R” section. If “R X.X.X” (where the Xs indicate the version installed) is present, you installed R properly! If not, your install was unsuccessful.
> If you have not installed R properly, try deleting your previous attempt, redownloading, and reinstalling.Note: We will not be using the R console (which will open if you try clicking R X.X.X). We will be using RStudio instead.
Download and install RStudio here. Scroll down to find downloads for non-macOS.
Note: While installing, you may be asked whether to install the 32-bit or 62-bit RStudio version. Download the version that matches your PC.
Install Git, if you don’t already have it. Git is a tool that will help us with version control when editing your workshop. Linux and macOS computers generally have Git pre-installed. Windows computers must install Git. However, make sure to double check if you already have Git, so that you don’t have to install it again! Check if you have Git by running this command in terminal/command prompt:
## git version 2.39.5 (Apple Git-154)If your output looks like “git version X.X.X …”, you already have git. Move onto step 4.
However, if your output says “Git is not recognized” or a similar statement (such as the one provided below), you do not have Git, so you must install it as well.
'git' is not recognized as an internal or external command, operable program or batch file.- When you ran
git --version, it will have prompted you to install Git. Follow these instructions.
- Go to the Git for Windows installer and download Git. Then, install it with all the default settings.
Click here for instructions on installing Git on Linux.
Double Check!
Check that your install worked! Re-run “git –verison” and check that you get your git version! (On Windows, this may look like “git version 2.47.1.windows.1”).
Note: If you installed Git while having a Command Prompt/Windows PowerShell window open, close this window and open a new one to run “git –version”. This acts as a refresher to Command Prompt/Windows PowerShell.
- When you ran
Install the bookdown R package: Open RStudio and run the following command in the console (in the bottom left window of RStudio):
install.packages("bookdown").Download all the packages you will need! Do this by running the following command:
You may have to approve some downloads. Say “yes” and enter your password when necessary. This tells bookdown you are okay with downloading and installing these packages in their default locations.
Finally, run the following command
We’re ready to start working with CBW’s bookdown workshop template now!
Go to the next step
Now that you’re done the installations, it’s time to go to the next step: creating a new workshop, if you’re a RC, or seeing your deployed website (skip to step 4), if you’re on the workshop team. The order of this documentation is provided in the sidebar on the left. You can also click the arrows below, to go to the previous or subsequent page!
Creating the SSH Connection
We need to create an SSH connection. You have already set this up if you have been git cloning, pulling from and pushing to GitHub. If you have, continue to git cloning. If you haven’t, keep reading!
Essentially, we’re doing these steps to update and receive updates from our GitHub repository, with security!
Follow the following 3 main steps. Each of these subheaders links to GitHub’s official docs, if you would prefer to follow them instead! (Below is the simplified version of the instructions, if you’ve already been working with GitHub/SSH connection and want to make a new one, consider using the official docs.) The official docs may be more up-to-date.
If you do decide to use GitHub’s docs, choose the page (the different tabs are clickable at the top of the page) that matches your operating system (Mac/Windows/Linux).
Note: You can do these commands anywhere in your files. You do not need to be in your home directory.
Output VS Commands
In our instructions (and the GitHub docs), output is prefaced by a “>” sign.
In the GitHub instructions, commands start with “$” sign. In Linux, the terminal tends to give you a “$” to indicate where to run your command. Thus, GitHub uses a “$” to indicate that what comes after is the command you should run. The “$” is not part of the command. (We do not do this in our instructions).
Generating a new SSH key
Open Terminal.
Copy and paste this text into your terminal. Replace the email given below with your GitHub email address (the email address you used to sign up for Github). Keep the quotations in your command. Press enter to run the command.
You will get this output:
> Generating public/private ALGORITHM key pair.
> Enter a file in which to save the key (/Users/YOU/.ssh/id_ALGORITHM):
Press enter. (This uses a default file and default file location.)
If you have already created a SSH key and you are asked to rewrite another key, look at the GitHub Docs for specific steps.
Type a secure passphrase (make up a password) when prompted with:
> Enter passphrase (empty for no passphrase): [TYPE YOUR PASSPHRASE]Before you freak out,
this passphrase is so secretive that won’t see it being typed. You won’t see a cursor moving and you won’t see ● instead of the characters you’re typing. Rest assured, your computer is receiving your text.
If you make a mistake, it’s best to hit the “delete” bar many times, and retype.
> Enter same passphrase again: [TYPE THE SAME PASSPHRASE]You should keep note of this passphrase for your own use. We (should) never have to use it again after finishing these steps.
You will get specific output telling you information about your public key and key fingerprint. This is specific to the SSH connection you just made!
[Linux/Mac] Adding your SSH key to the ssh-agent
These are the instructions if you have a Linux or macOS computer. Go here for the Windows instructions.
In terminal, run the following command:
You will get this output:
> Agent pid 59566(Your number will most likely be different than the one above.)
If you’re using macOS Sierra 10.12.2 or later additions, you need to modify your
~/.ssh/configfile.Check if you have a
~/.ssh/configfile: Run the following command:If you get the following output:
> The file /Users/YOU/.ssh/config does not exist.Create the file using the touch command: run the command given below
Edit your
~/.ssh/configfile using the following instructions. (You can use any text editor you would like, such as vim). Below we use nano as a text editor.- Run
nano ~/.ssh/config - Add the following lines to this file.
Host github.com AddKeysToAgent yes UseKeychain yes IdentityFile ~/.ssh/id_ed25519- Exit nano:
ctrl + X - Type “Y” and hit enter to save changes, when asked the following
Save modified buffer (ANSWERING "No" WILL DESTROY CHANGES) ?- Run
Return to terminal. Run the following command:
(You may be asked to enter your passphrase again. This is the same passphrase as before.)
[Windows] Adding your SSH key to the ssh-agent
Right click on Windows Powershell (you can search for it in your search bar on your taskbar) and select “Run as administrator”.
Run the following commands:
Open a terminal window (without running as administrator). Run the following command, and replace YOU with your GitHub username:
Adding a new SSH key to your account
Copy the SSH public key: Run the following command to copy the content of the ~/.ssh/id_ed25519.pub file to your clipboard:
On Mac/Linux:
On Windows:
Go to your GitHub account on the GitHub website. Click on your profile picture (icon in the upper right). Then, select Settings.
Under the “Access” section, click SSH and GPG keys.
Click New SSH key or Add SSH key.
In the “Title” field, add a descriptive label for this key you are creating (ex. if this is your personal laptop, you can call the key: “Personal Laptop”).
Leave the type of key as “authentication” (rather than “signing”). For our purposes, selecting authentication is fine.
In the “Key” field, paste (we are pasting what we copied in step 1).
Click Add SSH Key.
If you are prompted, confirm access to your GitHub account.
Finally, we’re all done! We’ve created a SSH connection between your device and GitHub!
Thankfully, we only need to do these steps once! Additionally, most security questions are only asked the first time, so when you work on your workshop in the future, you will not have to redo these steps or confirm authentication.
Getting the Template on Your Local Computer - Git Clone!
Navigate to where in your local file system you want to have your workshop in Terminal/Windows PowerShell/Command Prompt.
Recommended Workshop Location:
CBW recommends that you create a folder within your Documents folder called “CBWGitHub”, which is where you will place your CBW workshop project files.
In Finder/File Explorer:
- Navigate to ‘Documents’
- Create a folder and name it “CBWGithub”
Copy the file address of the CBWGithub folder:- On Windows
- Using File Explorer, find your “CBWGithub” folder.
- Right click the “CBWGithub” folder and press “Copy as path”.
- If you are currently inside the “CBWGithub” folder, you can right click on it’s name in the header and press either “Copy Address” or “Copy Address as Text”
- On Mac
- Go to the folder holding your “CBWGithub” folder (recommended to be your Documents folder)
- Right-click (or tap your mouse pad with 2 fingers) the “CBWGithub” folder and press the “Options” keyboard key (in the bottom left).
- While holding the “Options” key, go the the 4th section from the top, and click “Copy”CBWGithub” as Pathname”.
You may want to paste your file address somewhere where you can quickly find it, so it is easier to navigate to in the future.
Navigate to your workshop folder in Terminal:
Navigate using the “cd” command. For example, if you used the recommended instructions, you should run “cd” and paste (since you already copied the file address).
If you didn’t use the recommended path and folder name, you can use “cd + tab” (where tab is the keyboard key, “tab”) to try to find your path and folder.
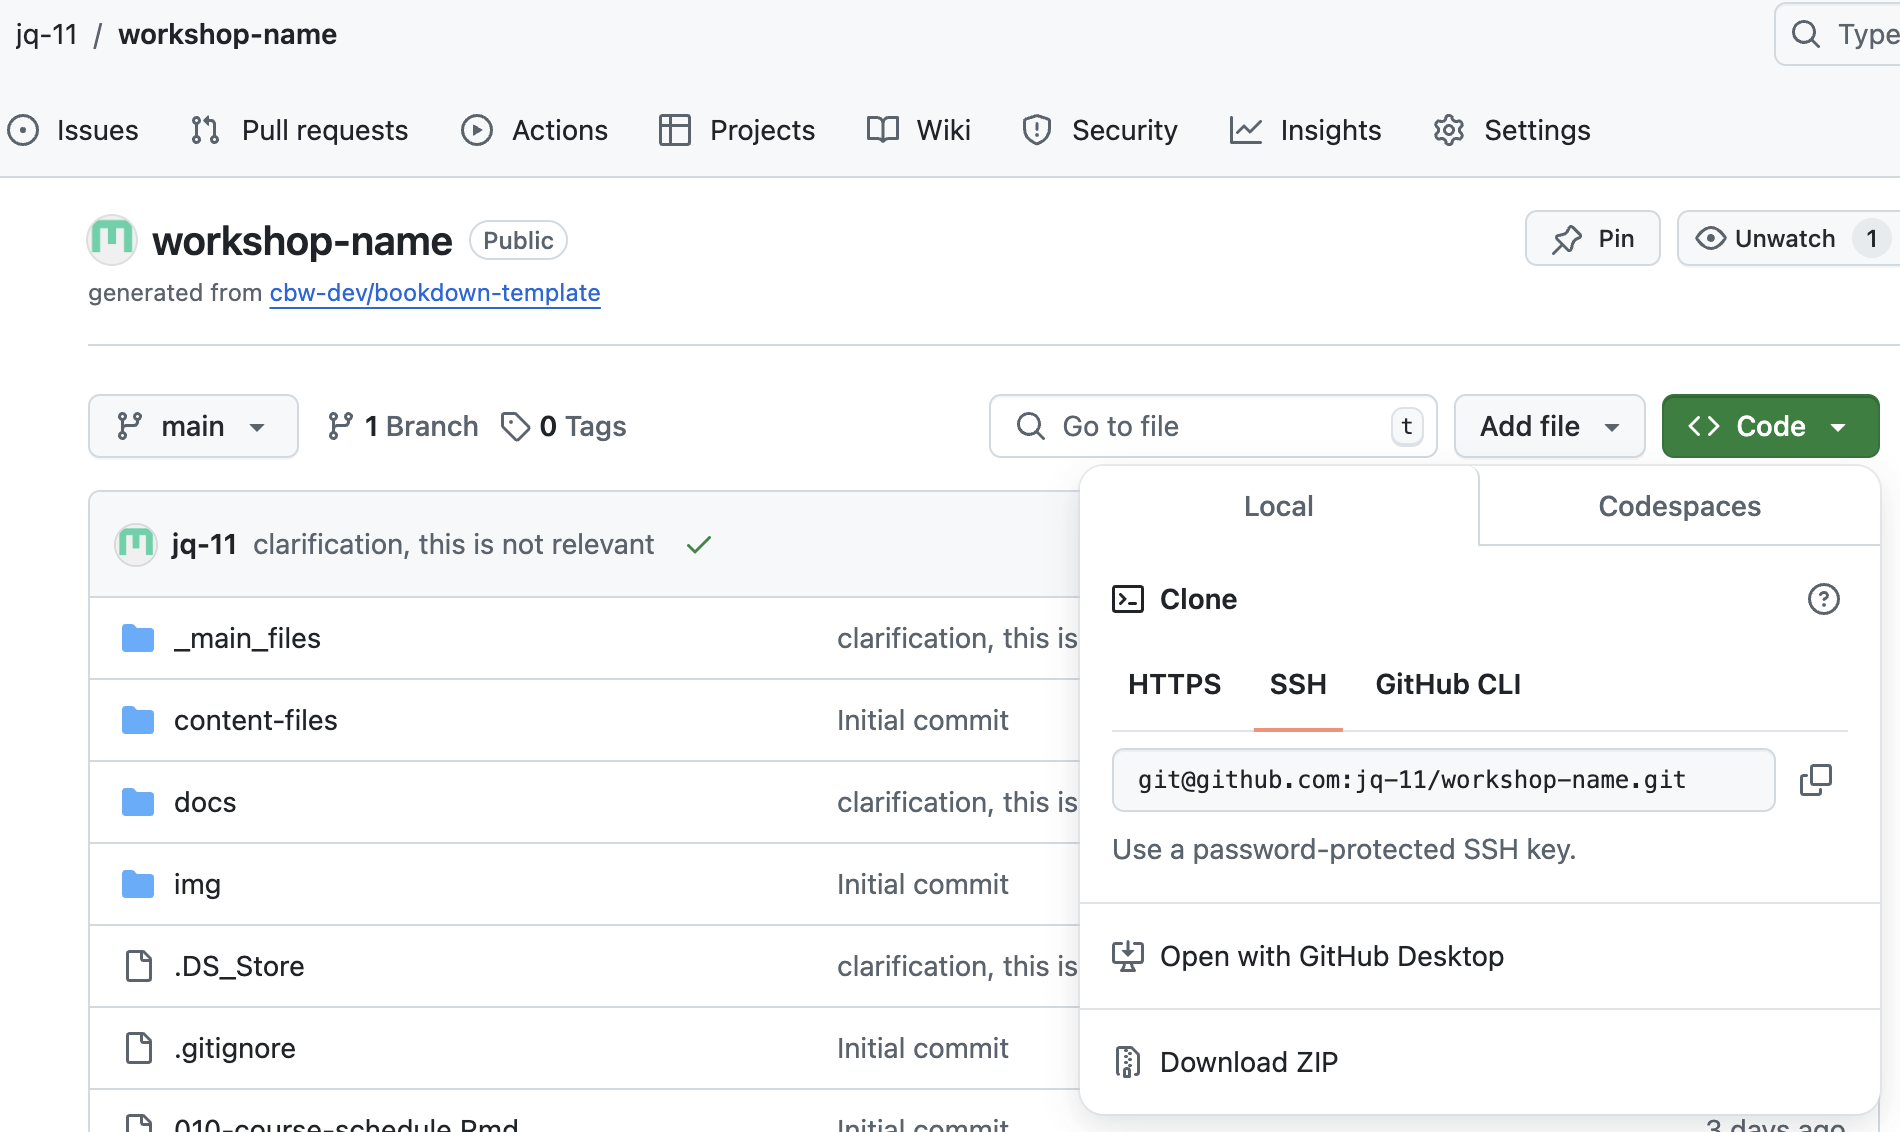
Return to your workshop repository on GitHub. Press
< > Code, which is the leftmost tab in the header bar on GitHub.Find the ssh for your workshop repository:
Click the green button entitled
< > Codeands see the drop down options.Click the SSH tab, as seen below, and then copy the text below it. The text should be something like git@github.com:bioinformaticsdotca/WORKSHOP-NAME.git, as seen below.
Edit and run the following command in Terminal/PowerShell/Command Prompt, within the folder you want the workshop folder to be in. (Recall that we navigated there in step 1.)
EDIT THE FOLLOWING COMMAND!
You can essentially type “git clone” and then paste the SSH url, and then hit enter. Below, you must delete the entire “git@github.com:bioinformaticsdotca/[YOUR WORKSHOP NAME].git” text, and replace it with the text you copied.
git clone git@github.com:bioinformaticsdotca/[YOUR WORKSHOP NAME].gitYou should be ready to go! With your given permissions, you should be able to git push (put your local edits on GitHub) and git pull (pull edits on GitHub to your local computer) fine!
Git Version Control Tip!
Consider having only one team member (or perhaps your RC) make git pushes or control pull requests. To avoid merge conflicts, designate 1 team member to control actual changes to your workshop repo. Other team members can fork or create branches, and create a pull request that the designated team member can check and overlook.
But what do any of these files mean? Which ones do I edit? Which ones shouldn’t I edit? How do I open this in RStudio? And how exactly is a page made from all these files??? It’s time for you to go to the next page :D
Oops, I Git Cloned the Wrong Repository and I Want to Delete it from my Local Computer!
That’s ok! To delete the entire local repository and the folder itself, run the following command:
rm -fr folder-pathwhere “folder-path” is a file address to the git cloned folder/repository that you want to delete.