11 Deploy your site
In the top navigation bar, select Settings.
See image
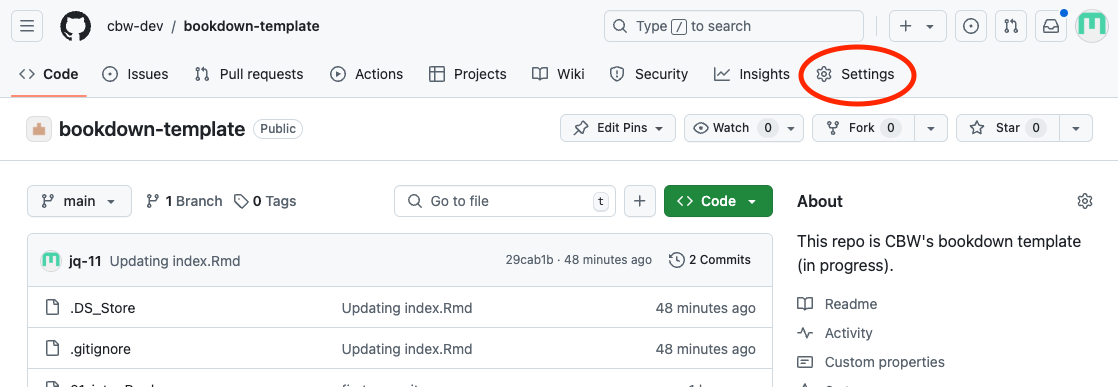
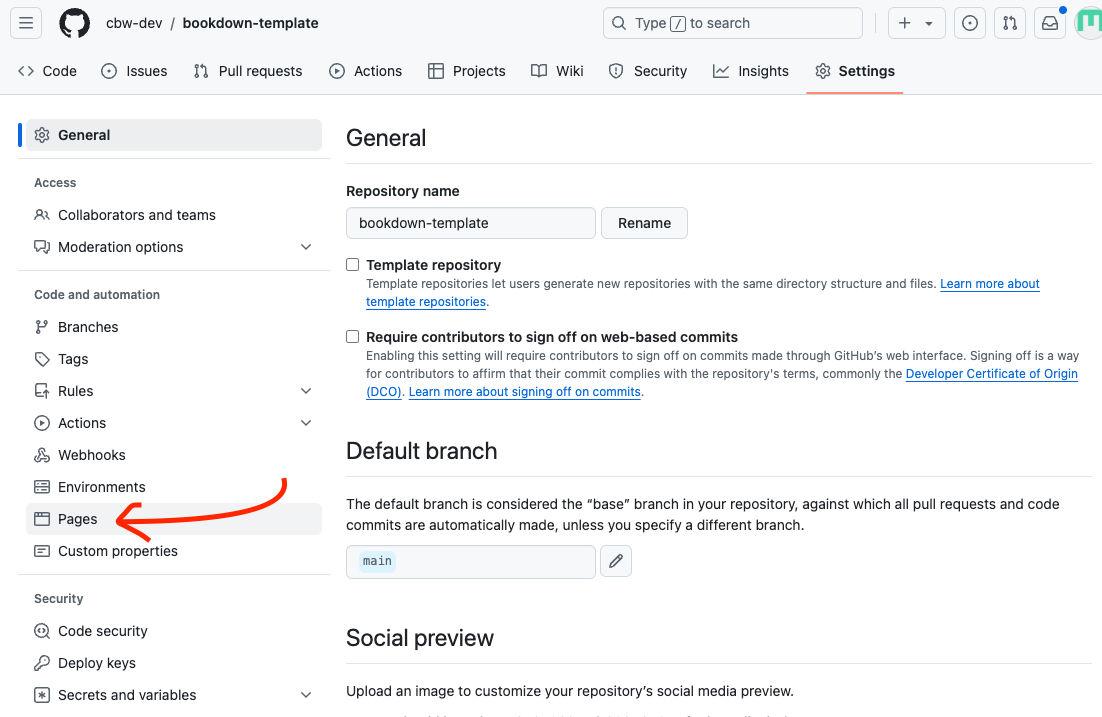
Then, go to the Pages sidebar option.
See image
“Deploy from a branch” is already selected, which is what we want. We must change the branch from “none” to “main”. Select the “None” dropdown button and select “main”.
See image
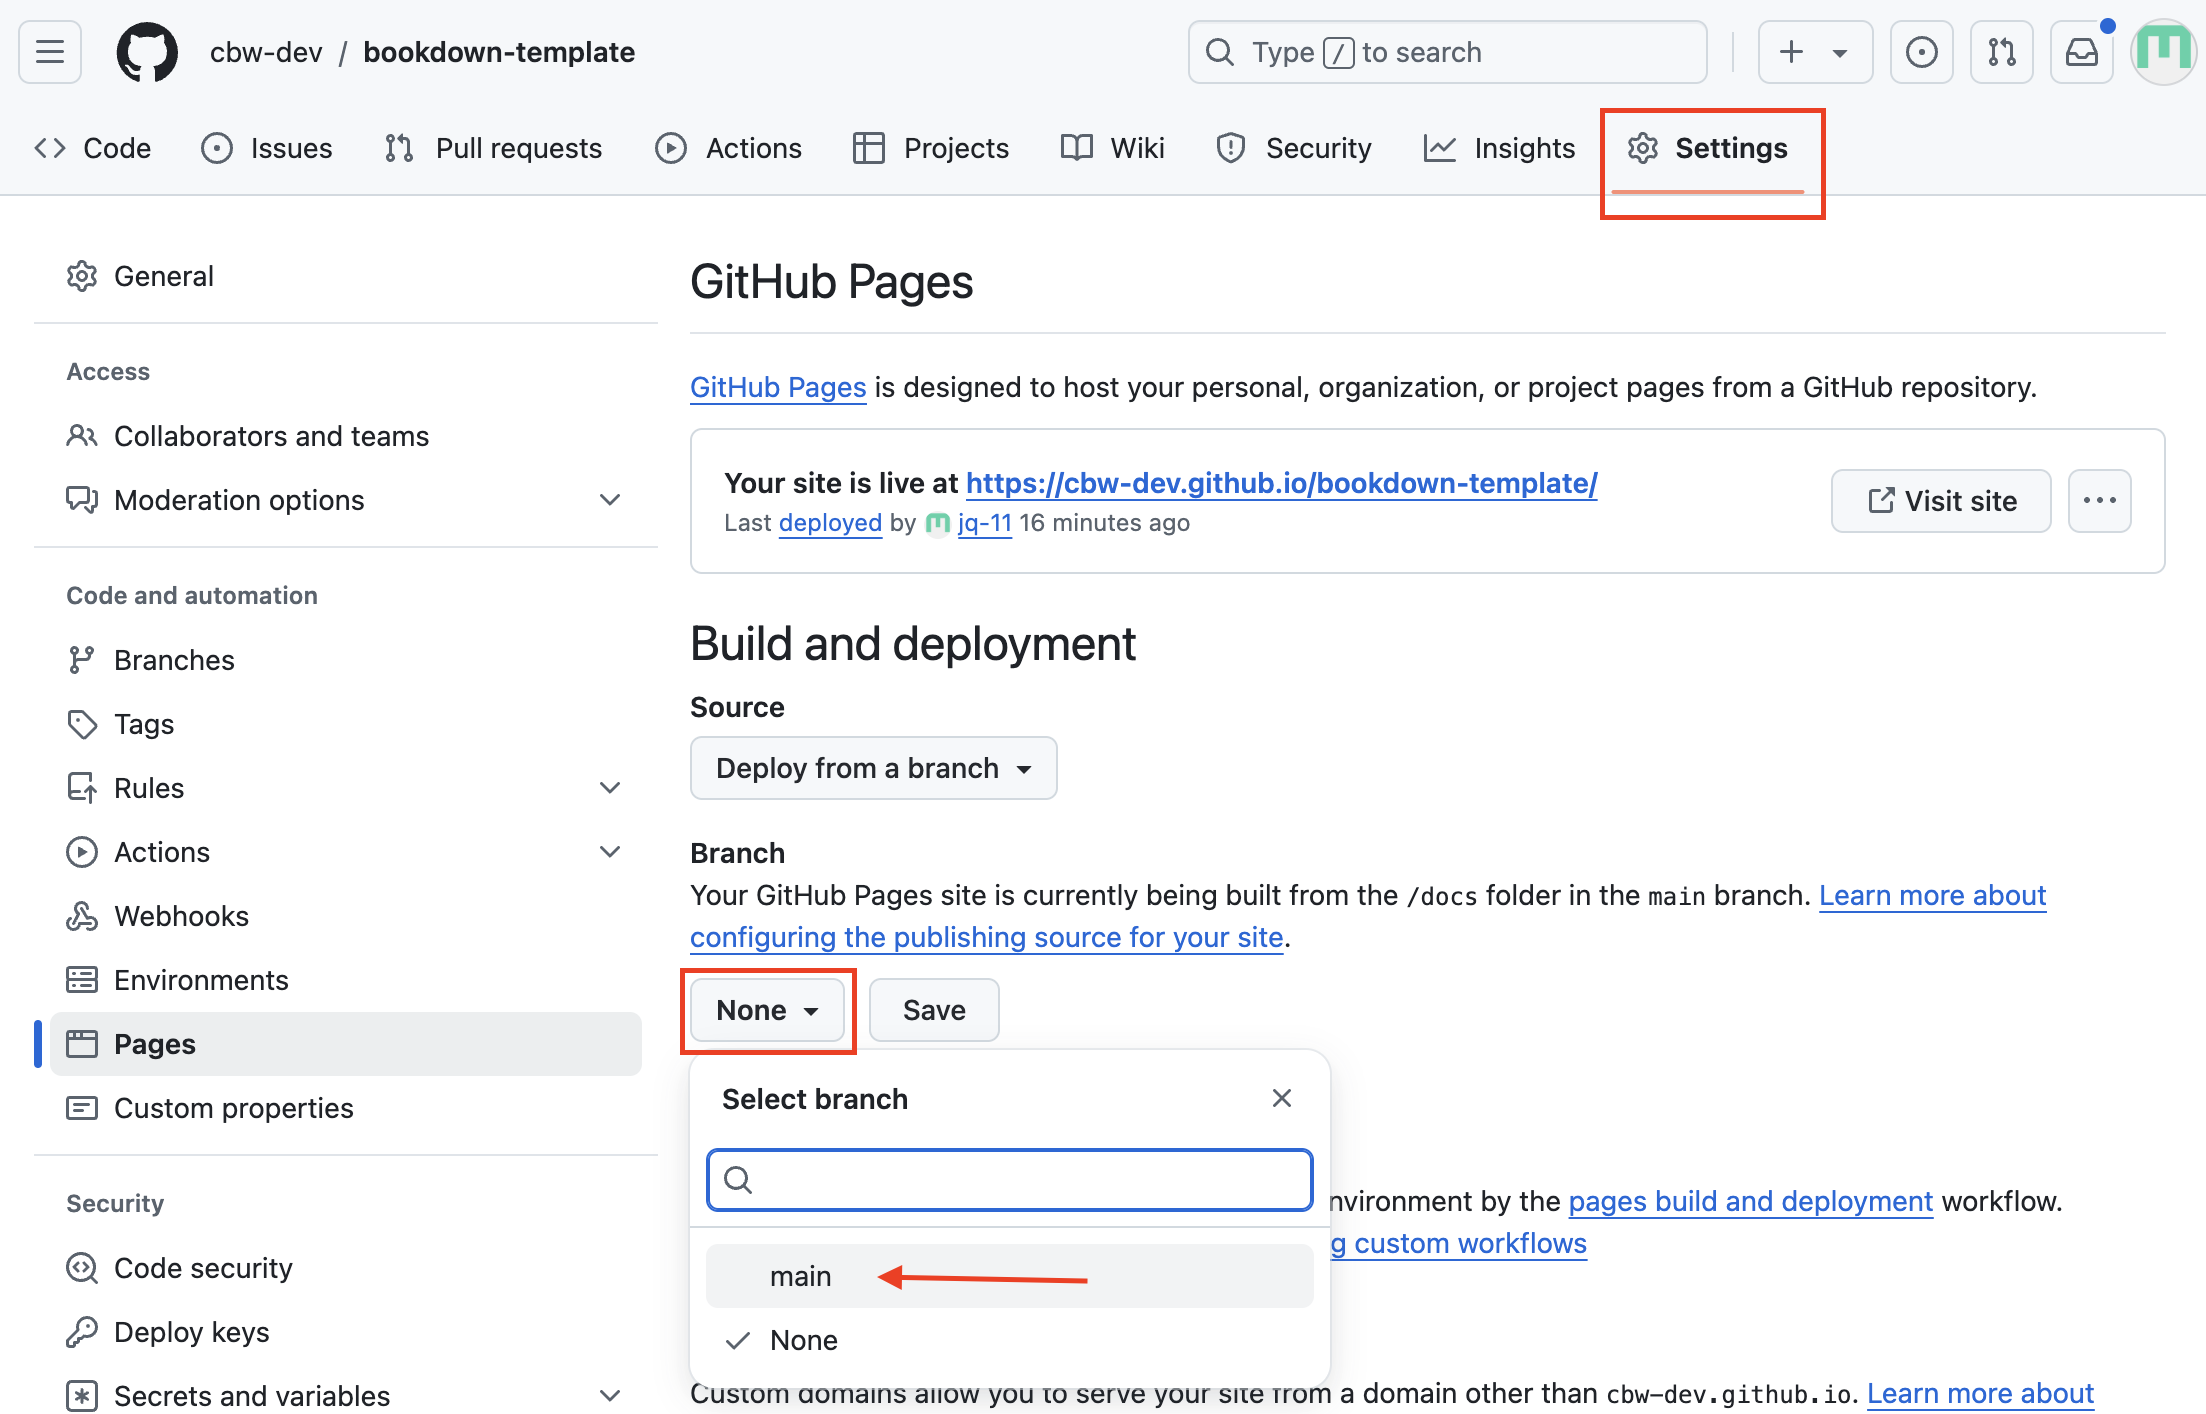
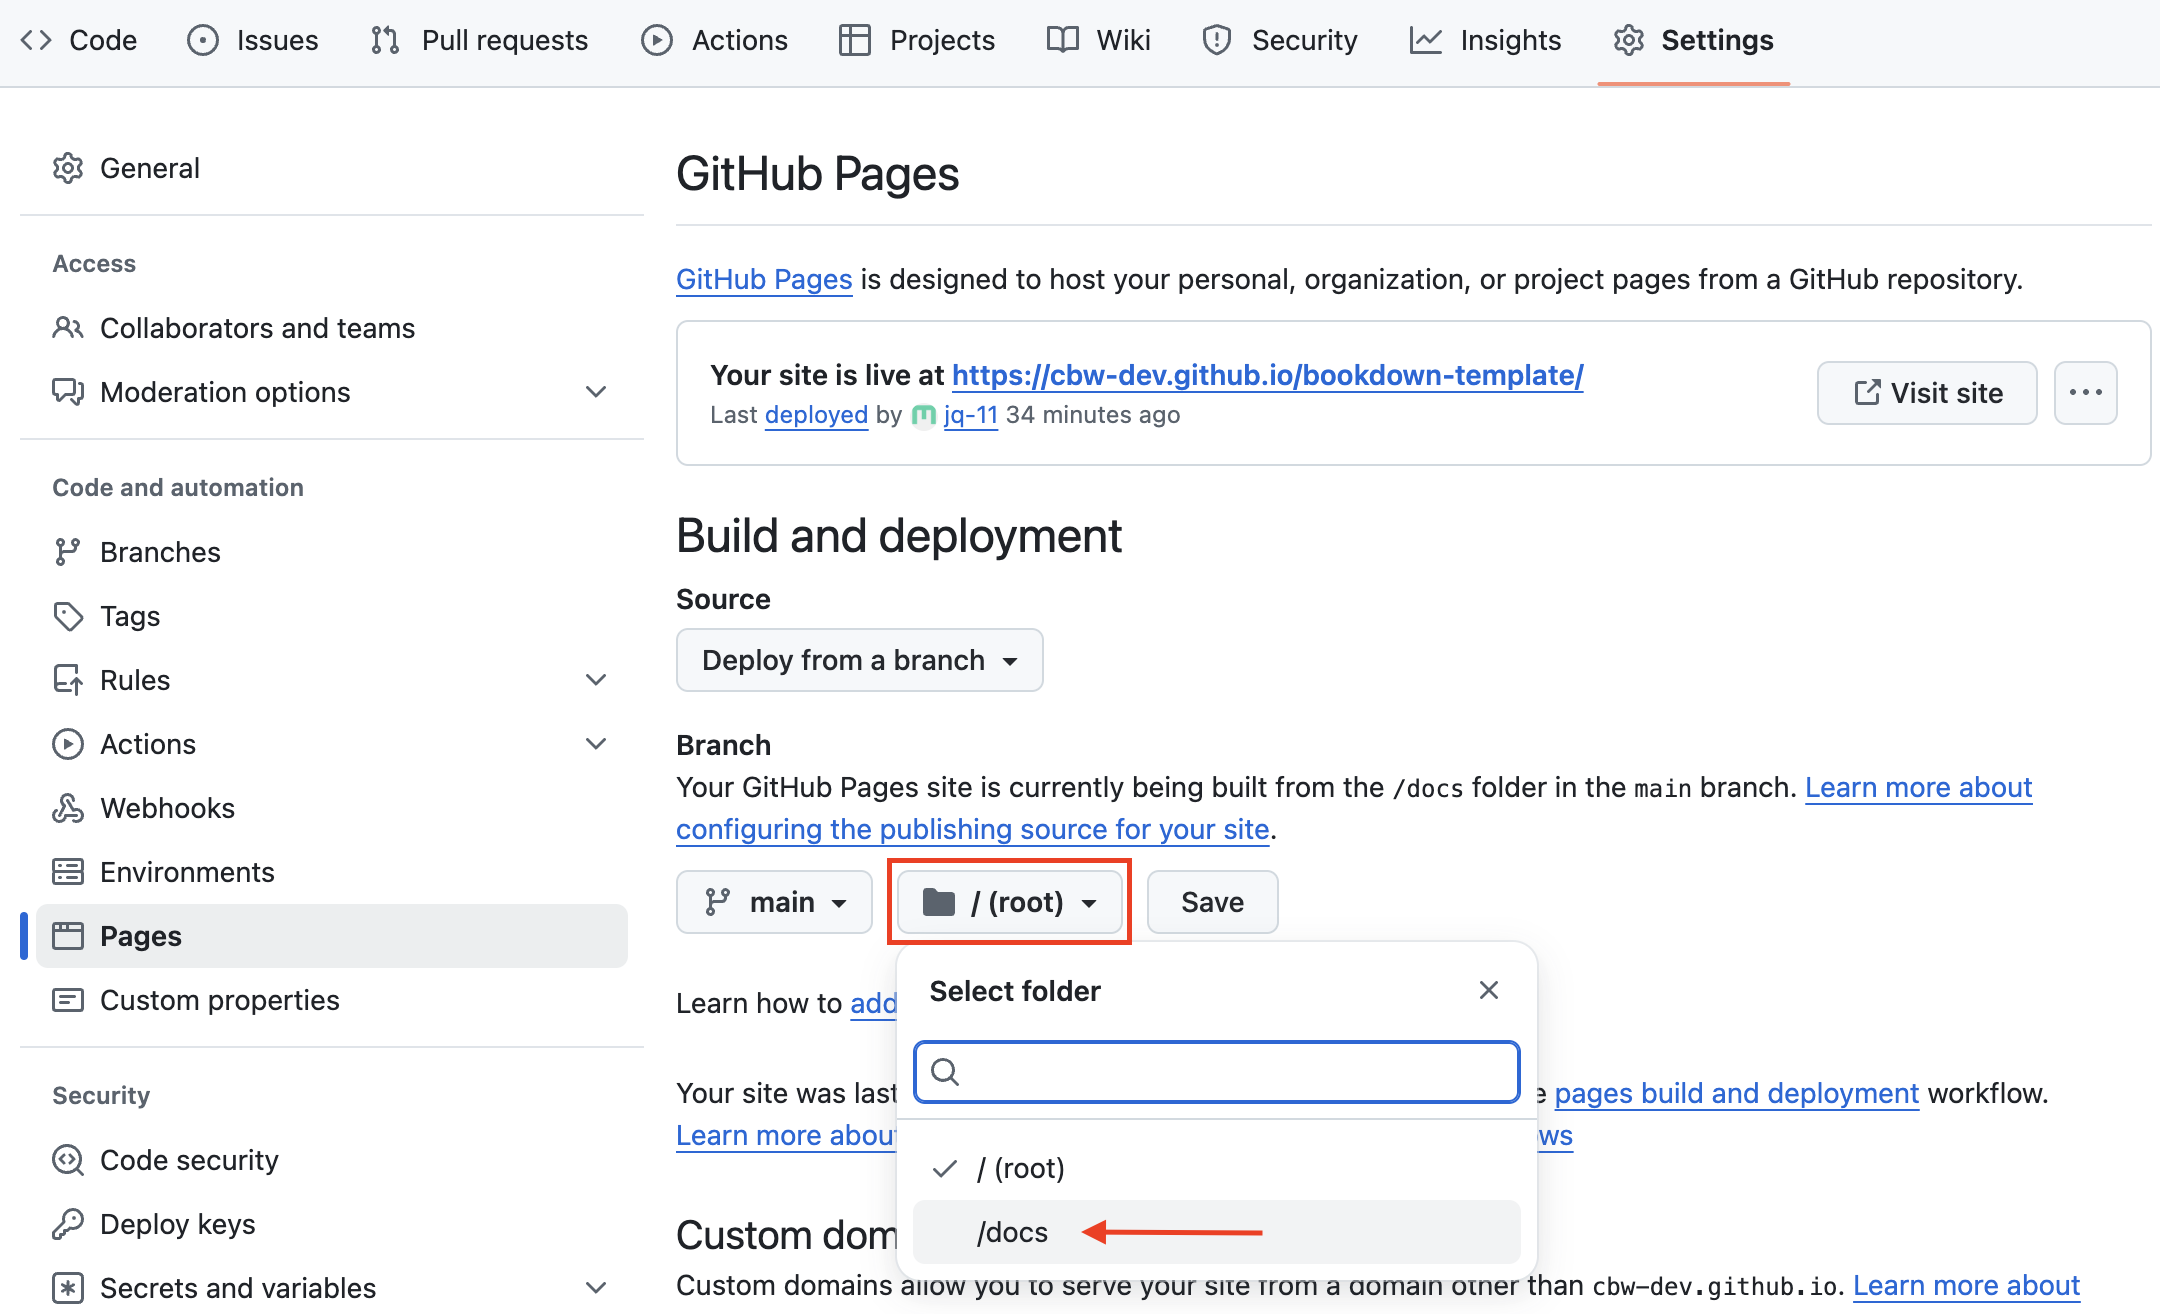
Change the folder from
/rootto/docsand press save.See image
Great! Now we’re waiting on the page to build and deploy, which should take less than a minute.
11.1 Check your deploy and see your website!
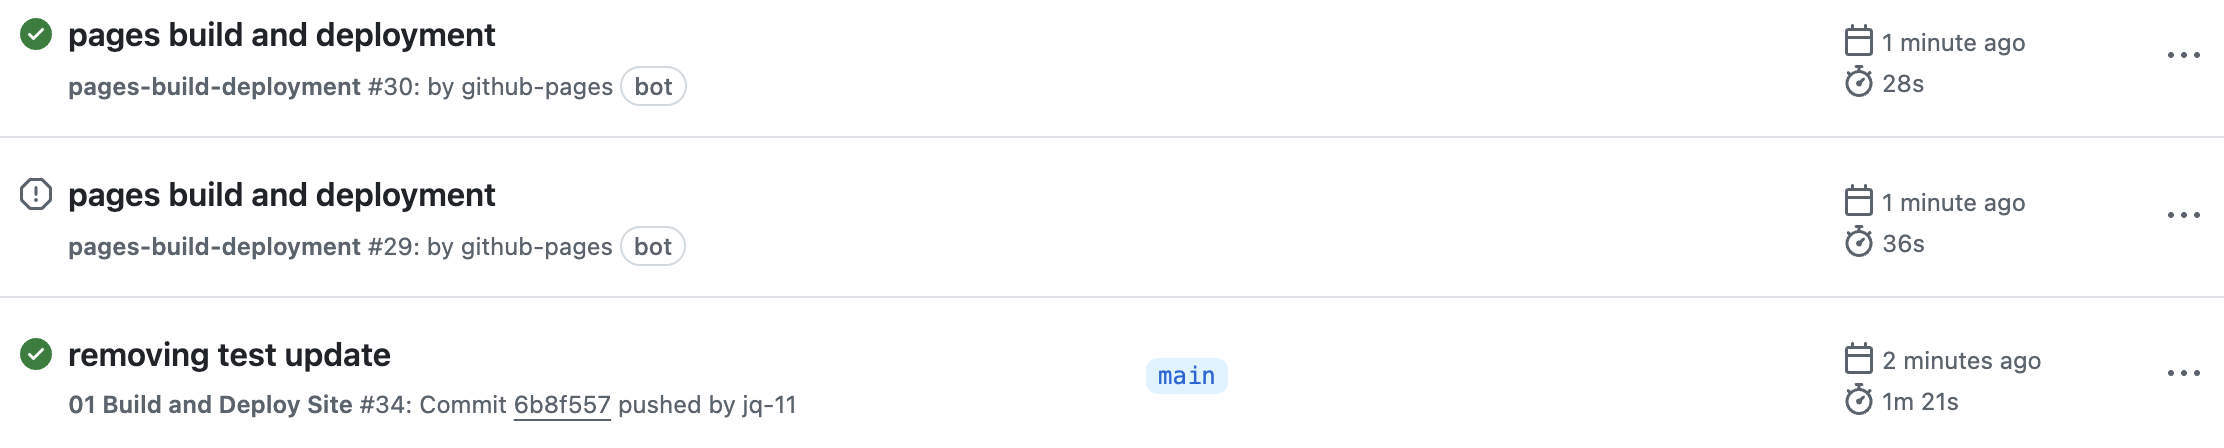
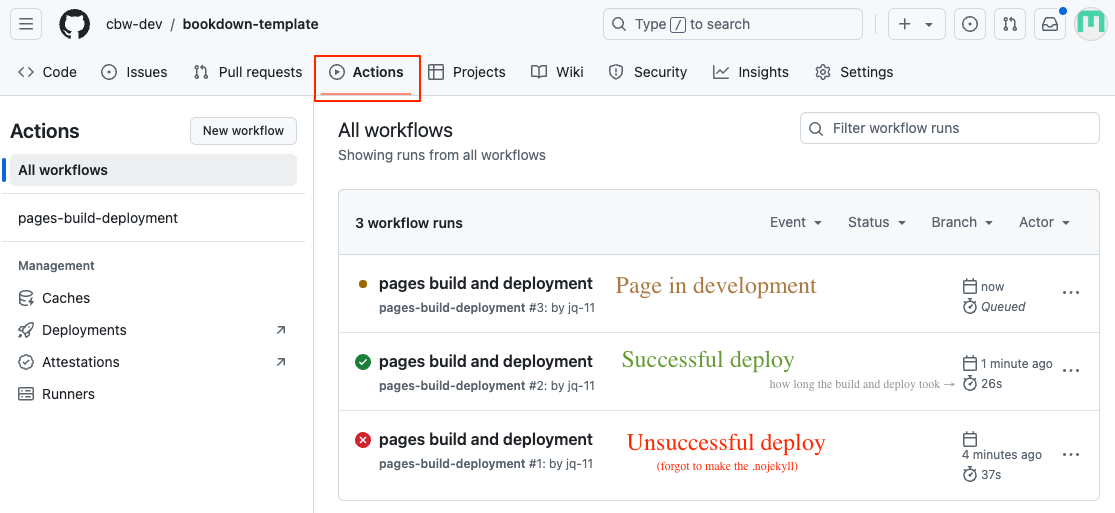
To see updates, go to the Actions page (found along the top navigation bar. This will help you understand how the deploy is working, and if it succeeded or failed.
See image
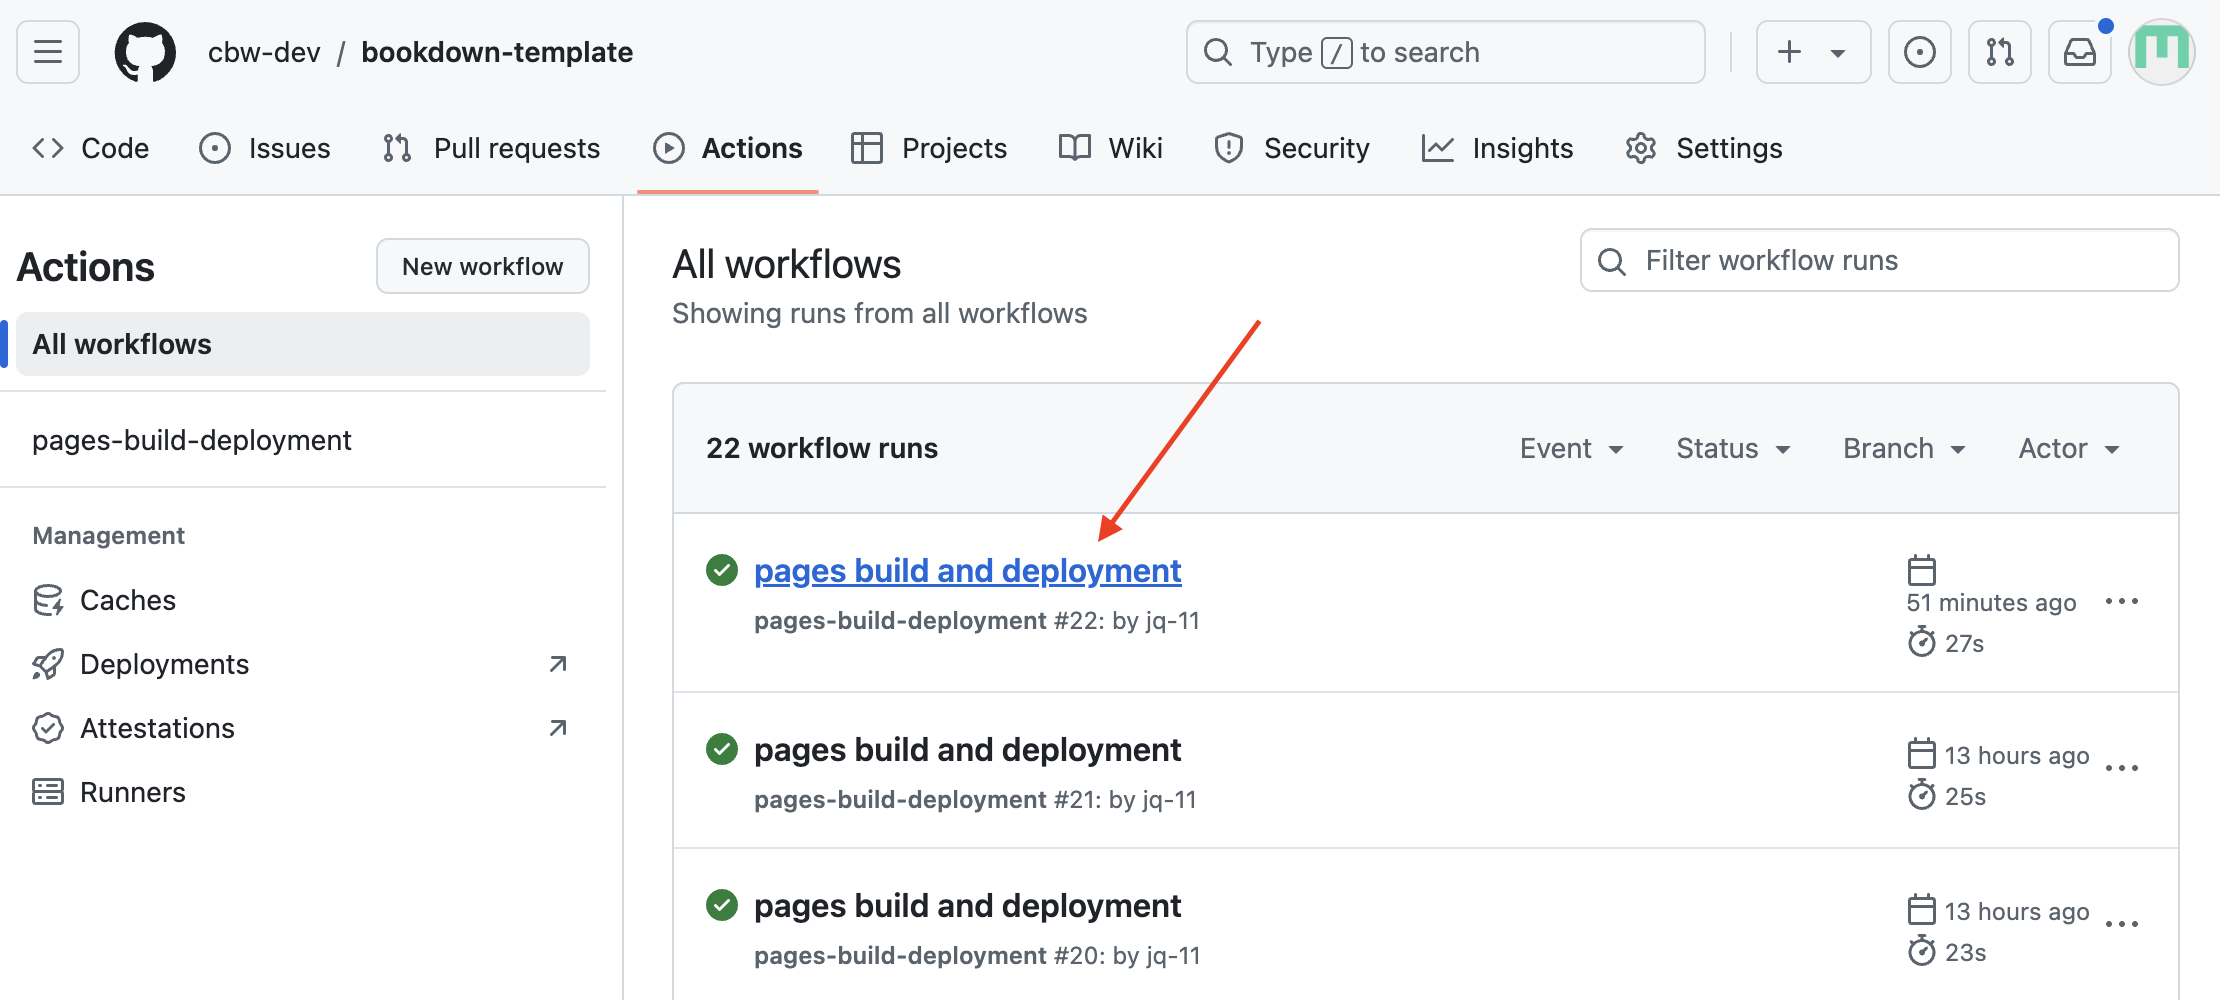
You can click pages build and deployment for updates.
See image
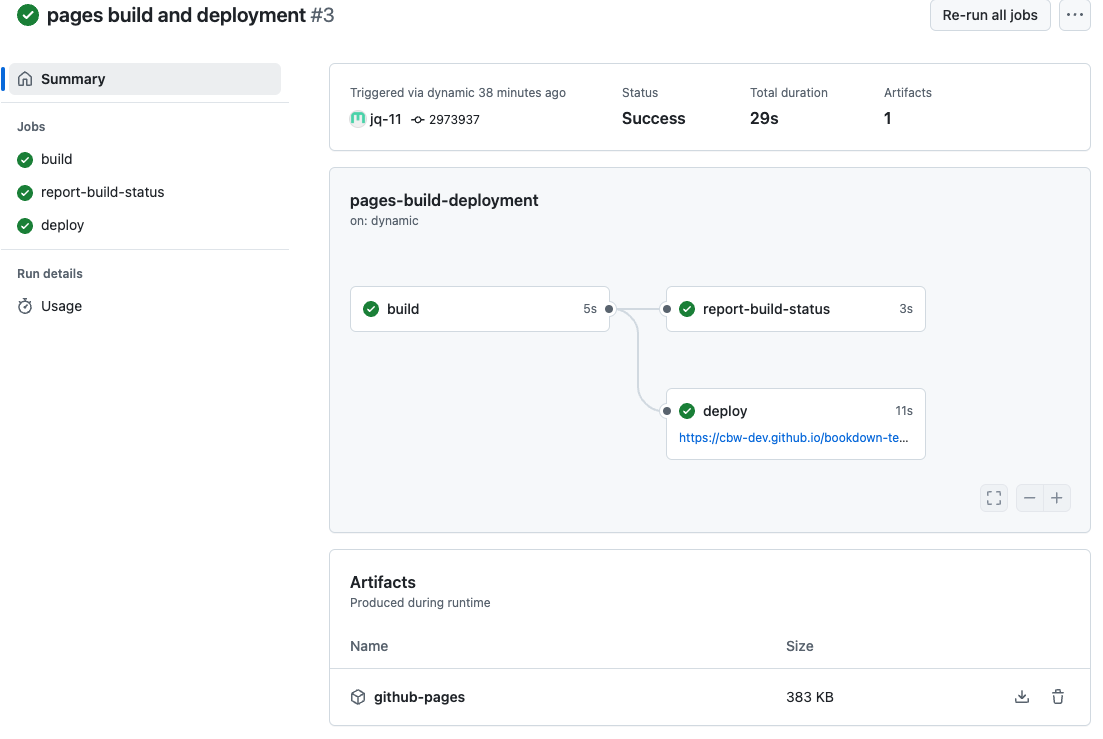
A successful deploy will have a green checkmark next to it. You can inspect the 3 steps: build, report-build-status, deploy. Once it’s done deploying, you can find the website at the link provided under the “deploy” step!
See image
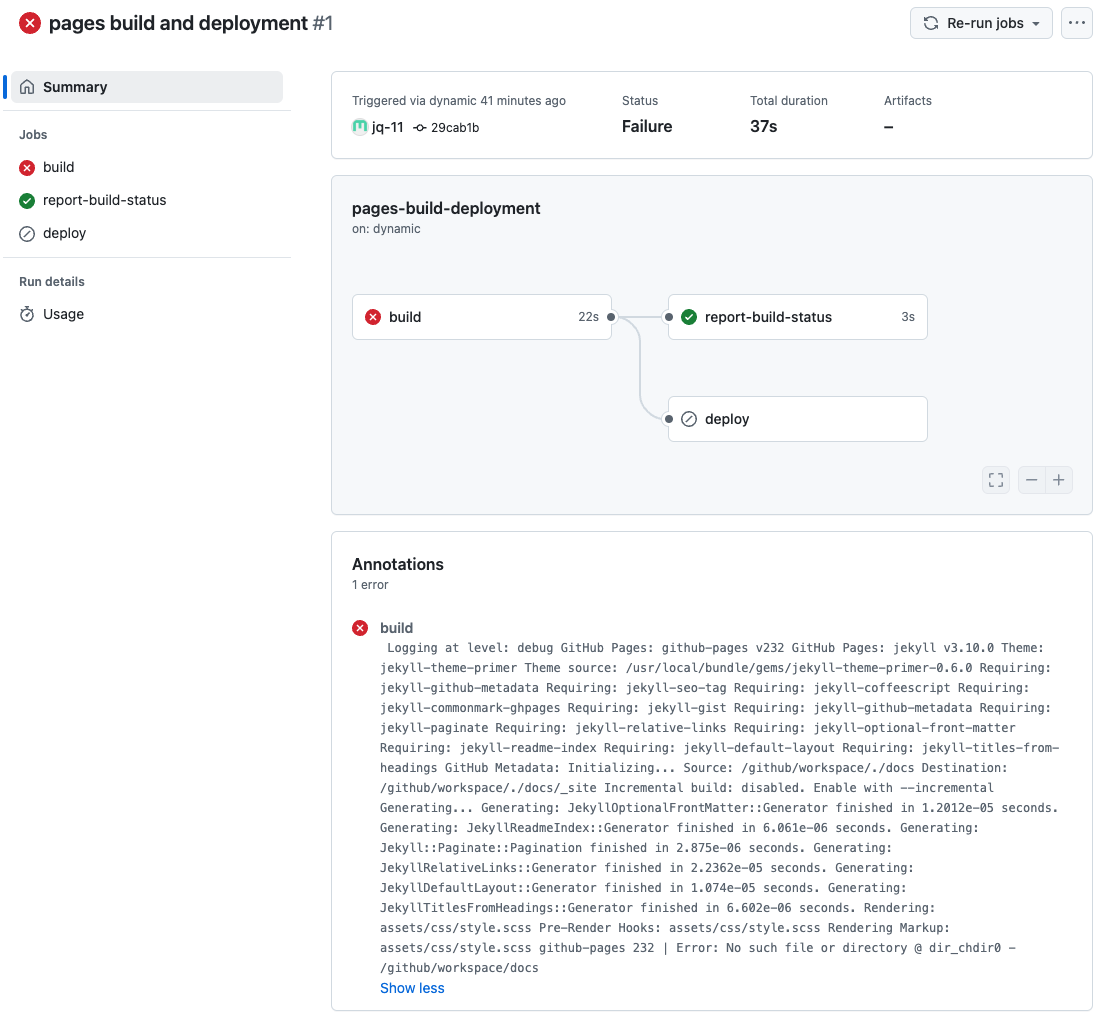
A failed deploy will have a red cross next to it. Clicking through the steps can help you determine what went wrong in the deploy.
See image
Important!
Warning: A website can build properly, but may not deploy properly! It is a good idea to check after making big changes.